skip to main | skip to sidebar
SHEnanigans
  • Shenanigans
  • Shenanigans
  •  Shenanigans
  •  Shenanigans
  •  Shenanigans
  •  Shenanigans
  •  Shenanigans
Homewho-whatHelpful linksThemes
Showing posts with label tips. Show all posts

Tuesday, December 7, 2010

How to work as a group by LaTressa

Last months theme was "family Christmas cards". We got some pretty intense awkwardness and amazingness, that's for sure! I don't even have words for it. Go look for yourself.

The dream keeps coming true with each new group that joins in. Here are some tips from LaTressa on how the group she plays with plan their photoshoots.


People often ask "Where do you get all your ideas?!" Well, I'll give you a little insight into what goes on in the mind of this silly girl when preparing for a Silly Girls Photo shoot.


Before I even know what the month's theme is, I like to brainstorm with my group to get any suggestions for themes we'd like to do, costumes we'd like to dress up in, etc. One tip is to think back on your childhood... what kind of things did you like to pretend or dress up as? Did you love to make-believe you were a princess, an astronaut, a rock-star, an animal? Reconnect with your inner child and you will probably find it easy to come up with inspiration. So we start throwing ideas out there, and see how everyone reacts. If all seem excited by a particular idea, we add it to a list we keep in my phone notebook. So, once we've got our list of ideas we all think we'd enjoy seeing come to life, we save that until we find out what the theme is for the upcoming month is. If nothing immediatly pops into our heads as an idea for that theme, we go to our list and see if any of those ideas would fit in with the theme. Once we decide which direction we want to go in, we start letting our creativity take over, and it all sort of falls into place from there.

One thing we do to prepare for our shoot is go through our closets, our husband's closets, our mom's closets, wherever we can think to get clothing and accesories that will fit with our theme. Most of the time we find what we need and just have to put outfits together creativily with stuff we already own. But occasionally we will do a little thrift store/yard sale shopping, searching for that perfect piece that will complete our look. We have get together a couple weeks before our shoot, and bring all our clothes/jewelry/accessories/props together and share and swap stuff to make our outfits cohesive and coordinate our looks.

When it comes to putting an outfit(s) together for a specific style, we find it helpful to go to the internet and search images in that theme, we will copy those pics and share them with each other through texts or facebook messages. It helps the ideas flow and gets you in the right mood, and then we take those ideas we like and apply them, and add our own twist and flare to make it "ours."

The next step, once we've figured out our outfits and costumes, is to find a perfect location. We all brainstorm and suggest what we think might be a good backdrop for the occasion. If nothing comes immediately to mind, we each do a little looking around before we meet up for the shoot. I like to drive around town and keep my eyes open for any place that would make a good spot. I've found lots of great places just by doing "drive-by's".

So that is basically a step-by-step of our process of coming up with, and carrying out our ideas for Silly Girls Photo shoots. I find it a perfect outlet for my creativity, and enjoy stretching my artistic muscles to come up with new ideas and seeing them come to life. I think the most important part is to have FUN with the whole process!!! Don't be afriad of or concerned with what people will think, choose themes that get you excited and make you giggle. Sometimes you have to go outside your comfort zone, but that encourages growth, and makes for some great memories and interesting photos you can enjoy for years to come!
Posted by Laura at 7:57 PM 1 comments
Email This BlogThis! Share to X Share to Facebook
Labels: tips

Wednesday, October 20, 2010

How to take a Self Portrait

We've had an impromtu theme pop up this past week on the Silly Girls United facebook page that involve Sugar Skull-esque makeup and costume and self portraits and it's been so fun to see everyone join in. Hopefully there are more who will.

Here are some tips on how to take a self portrait:
1. Relax. I sometimes feel self concious of myself when I'm taking a self portrait but really, there's no-one else there and no-one has to see the pictures you take that don't go as planned. Loosen up. You can be a huge dork and no-one will know!

2. Natural light is your friend. Stand by a window with the blinds up. Play with the light.

3. Hold the camera out at arms length and press the button. This way you can play with angles and positioning. This is best for shoulders and up shots. I like to hold the camera up over my head and pointed down. When I take shoulders and up pictures I'm often wearing pj's on the bottom ;) Don't be scared to look at the camera, use your reflection in the lens as a mirror even. AND don't be scared to get close.

4. Prop the camera on something and set the timer if you're wearing a wicked outfit. I have a remote clicker I use with my camera.

5. The wonderful thing about digital is that you can look at the pictures once you've taken them. Do that and laugh. Just have fun. Create a character for yourself and act it out whilst snapping pictures. Look at the other pictures posted for tips on posing and framing.

6. Look around you for props. In my pictures I used a sheet of gift wrap and stuck it with magnets to the window frame. You have loads of things in your house you can use. Work with what you have. Wear things ways they aren't meant to be worn. Sometimes I wear tops backwards - nobody sees the back in the pictures. Megan once wrapped blankets around us and pinned them with clothes pegs to make prairie skirts. It felt weird but it looked perfect, you couldn't see the pegs and pins.

7. Editing, I've said it once and I'll say it again. You don't need expensive editing software or a degree in order to process pictures. Use free ones like picnik to make some amazing pictures.

I am really proud of everyone who takes part in these. They often start off feeling uncomfortable but it always ends up so much fun and it gets easier with practise. The creativity, attitudes and friendships are wonderful to witness.The key is to feel comfortable with yourself and to just have fun.

Here's some make-up tips from Stephanie.
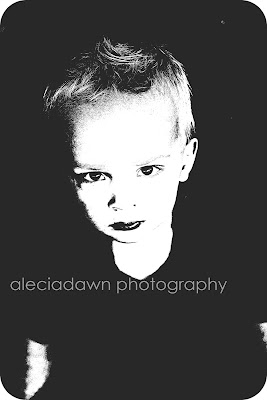
Some photography tips from Alecia.
And a pep talk from Chiemi.
Posted by Laura at 10:41 AM 0 comments
Email This BlogThis! Share to X Share to Facebook
Labels: tips

Wednesday, August 4, 2010

5 tips from Doe Deere

Xenia is a huge inspiration to me. I don't think I even need to explain why. Take a look at her gallery  (and here) via her blogazine to see more.

Here's five tips from the Deere herself just for you...

She's a breath of fresh air. Maybe we need to do a Doe Deere themed shoot?


Don't forget Top Secret Movie themed pics are on the Silly Girls United page.
Next upload day is August 30th & 31st and it's a free for all :)
Posted by Laura at 11:10 AM 1 comments
Email This BlogThis! Share to X Share to Facebook
Labels: tips

Tuesday, July 20, 2010

Photo Tips by Alecia.

Hello, SHEnaniganers!

This is Astrid from the Omega Force!
(aka: Alecia~ aleciasphotography.blogspot.com )


I was asked by the awesome, inspirational,  head SHEnaniganer herself, Laura, to do a photography post!
She could probably do this herself, because she does photography also, so this was way nice of her to ask me! 
* I do not claim to know it all about photography, just so ya know! you may have a style you prefer, and if so, that's wonderful! I just want to share some things I have learned through my journey in photography.
_________________________________________________________________
.

First of all: CAMERA
 -You do NOT need an SLR (aka: big, nice expensive camera) to take good photos. It does help of course. And if you do have one, by all means, use it! Better yet, if you have knowledge of manual mode, use it! But chances are, unless you do photography for a living, you do not have a huge camera or the know how. WHICH IS FINE. People like to think that the bigger camera you have, the better photos you'll get. Not entirely true. Big cameras do produce better quality of course, but why do you need super great quality and humongous sized files unless you plan on blowing those suckers up large and selling them? Truth is, you don't.  These days, most digital point and shoot cameras will do the job just fine, if you know a little about what you are doing.
This brings me to camera settings. Again, if you are comfortable with manual mode, that is wonderful. If you have never even heard of manual mode, its ok! chances are, if your group assigned you the photographer job, you have a camera that you are comfortable using, and you can produce some nice lookin photos. you probably know how to disable your flash, right? because you can get better photos without that darn flash most of the time.

-Second: LIGHT
 -Photography is all about light & knowing what to do with it.
Some amazing things can be done with light, all different kinds. The trick is, making it work with the light you've got. I usually head straight for some nice open shade. If you are doing headshots, or close ups, shade is your best friend.
this photo was shot in the soft shade of a building. Instead of facing her toward the building, I had her face toward where the light was coming from but not IN the light, if that makes sense.

-The key to knowing you're in some great light for portraits is to check your subjects eyes. If they are reflecting tons of light in them (photo above), you're set! (these are called catchlights)

this photo below, is an example of shooting in spotty, uneven shade.
where is the first place your eye goes? Mine go straight to that big patch of light on his shirt!
yucky!


If you can find soft open shade, you are in luck. But sometimes you can't. Maybe you are shooting in an open area at 12 noon on a cloudless day. This would be your worse case scenario! If this happens, you'll be needing to turn on your flash, to fill in the shadows that the harsh sunlight is creating on your subjects face.

this isn't the best example, but it is one. This was before I knew squat about photography, obviously. I wasn't shooting at noon, but there are yucky shadows on all of their faces. With a flash, this would have been taken care of.


See? This is better. Their faces are all evenly lit. I hate using flash, but sometimes you have to in harsh lighting situations.


Then , there is backlight. I love backlight and always use it on photoshoots. If you sun is bright and glaring, you NEVER , EVER, EVER have your subject face it!
this is a nice photo of everything else EXCEPT my son, because he's squinting. His face is tense because the only thing he can focus on is trying to keep that sun out of his eyes!
This is NOT flattering, or comfortable for your subject.


Instead, put their back toward the light. See that lovely glow behind him?
That's how you deal with a bright sun. (and we have lots of that here in St. George)


If you are going to shoot indoors, don't use fluorescent light. Place your subject in front of a window.
Soft window light is terrific!


When there is NO light, get creative!
silhouettes are SO FUN!


So there's my quick run-down on light.
OWN your light.

Next, TIPS ON SHOOTING

- Either get on eye level with your subject, or be above them when shooting. Looking up at them with your camera is NOT flattering. (Unless you are trying some creative angle, then its fine) Pretty much, you want them looking up at you.

- Try to have your subject relax. This helps if you relax. Laugh, joke. This is fun, remember? We tend to tense up in front of the camera, and it totally shows. 

-Laugh. Tell your subject to give you a fake laugh. a fake laugh will turn into a real laugh, and a real laugh turns into a real smile. And real smiles are beautiful.

-Take LOTS of photos. If you have a digital camera, then you can just get rid of what you want later. Its better to have too many than not enough. Plus, if you take lots, you'll be capturing more.

-Don't stop taking photos if they start laughing or do a silly face. That is totally them! You are wanting to CAPTURE them. Sometimes these photos, (the ones we don't think to even take, are the best ones!) Plus, you'll look back at the photos, remember the moment and laugh even harder. That's what we want, right?
-Tell them to be natural. You can tell when someone feels uncomfortable because what they are doing is totally unnatural. I always tell my subjects to go sit down like you normally would, if I wasn't here. And THAT's when they look the best.

-Details. Capture details. (I forgot to do this on the Omega force shoot) Shoes. Jewelry. Accessories. ANYTHING that helps depict what YOUR photoshoot is all about. We spend so much time on details, and most of the time forget to capture them.

-Get close-ups. Fill your camera's entire frame with their face. Don't be scared. You'll be glad you did later.


-Keep composition in mind. Does something look off? or unbalanced? An amazing photo is usually amazing because of the composition. Make it look interesting to our eyes!


-Get Creative!! Have FUN!!! try new things. focus on something different. Some of my "mistake" photos have been my faves!


WHEW!!! Am I done yet??? Never! Haha, I could go on and on....
BUT I only have one more thing for you now..
and 
it's

EDITING
Photos NEED to be edited & touched up! Most photos need brightening, sharpening, enhancing, cropping, 
you can create so much drama depending on the way you edit. You can make a photo look old and vintage or bright and cheery, or classic black and white. You can add textures, change colors, fix things! You can do so much!

Here is a photo straight out of camera:


and here it is with a simple, basic edit.


you can completely transform a photo & this is where you can have lots of fun!

if you don't have photoshop, or photoshop elements, ITS OKAY!
I used photoscape for a very, very long time. You can do some great things with that program! and ITS FREE!
there are also others you can use, like I've heard picnik is good.


Aaaaand..that's my rundown.

I hope I didn't bore you to tears, or confuse the crap out of you. Hopefully, this HELPS you and inspires you with new ideas!

We can all learn from eachother, so lets get that creativity flowing!

Can't wait to see what you all come up with! :)


Posted by Alecia at 9:35 PM 12 comments
Email This BlogThis! Share to X Share to Facebook
Labels: photography, tips

The Pep talk a la Chiemi

Hey everyone! Are you ready to rock the next photo shoot?! Just a wee bit nervous? Sometimes it can be embarrassing to come out of your comfort zone and try something completely new and different. So I have a composed a list of things to help you feel more comfortable and have fun!

1. First things first, find a group or start one. This might be the hardest part for some. Don't be afraid to make new friends and get your current friends in on it.

2. Share your thoughts with your group when you get your theme. Don't be afraid to say you aren't comfortable with something or if you need help. It's okay to ask. :) I am willing to admit I dropped out of my group at first because I was worried about how strange our photo shoot was going to be. I mulled over it for a while and got back in once I realized I could "just say no" to anything too over the top. Though in all actuality it turned out just fine.

3. Have confidence in yourself. It's so hard at times to take a picture of myself because I don't like the way I look anymore. These photo shoots should be the opposite. You should feel awesome about yourself. Just remember, and keep telling yourself that YOU are smokin' hot. Take that attitude to the photo shoot and you will feel awesome.

I know these are just a few things, but it's all you really need to have a super time. I hope that you all have fun and rock your photo shoots! I can't wait to see what everyone does with their theme. You can do this!

You're AWESOME!
Posted by Laura at 7:44 AM 2 comments
Email This BlogThis! Share to X Share to Facebook
Labels: tips

Monday, July 19, 2010

Fierce Makeup Tips for your outstanding photo shoots by Stephanie "Mammory Cannons" Toland.

You most likely already know how to apply makeup for everyday use but there are a few things that are different in applying makeup for a SHEnanigans photo shoot.
-First and foremost, RESEARCH is KEY in creating the correct makeup look to your shoot. Whichever Movie Genre the lovely sexy Laura assigns you; research the era in which you will be portraying. For example if you are doing a 1940’s Musical, Google Image 1940’s musicals and print off some desired makeup references such as the classic Judy Garland look in Meet me St. Louis. In doing this, it will also motivate and excite you to get started.

Fix your face:
-The first key to HOT steamy SHEnanigans makeup is to simply fix your face as if you were going out for the evening, wearing more than for daytime use. We want people to look at you and think “WOW” you don’t even look like your ‘Plain Jane’ homely self.

- Foundation: (Again keeping in mind to what Era you are doing and staying with that time and style). Create extra contrast by using more powder, blush, and or bronzer. With that you will achieve that natural look (in the photos) also covering your bumps and blemishes in the photos (also with great photo editing you can get rid of that monster pimple… So don’t worry about that). But keep in mind to stay true to your natural colors (don’t use a darker color tone in your concealers and foundations then what your skin requires; it may not even hurt to go lighter in your concealers)… we mustn’t look like Oompa Loompas.

-Blush: Apply your blush a little heavier than normal but neatly and precisely. Don't over or under apply blush. This will also be in accordance to the effect you want to accomplish with your look for this particular shoot. Like I said before in your research you will find which “blush look” you will need to achieve to your era. Because as we all have noticed blush styles have changed drastically over the years as much as hair styles do.

Lips:
-In order for your lips to stand out and be noticed, be sure that your lip gloss is a solid color and at least one shade deeper/with higher contrast than you normally wear.

Your lip liner should be the same color as your lipstick. Unless you are going for the hooker look… slut it up and go Dark…we aint Hatin!

-Stay away from any frosted lip colors entirely because they hardly show up in photos and will give the illusion that you are not wearing lip color at all. The only time you would wear frosted is when it's for some effect you’re trying to accomplish like a HOT 1970’s Sci-fi European Bomb expert… then it's cool.

Eye Makeup:
-In order to produce the best results, your eye liner needs to be bold and thick… BUT MOST IMPORTANT if it’s thick on top- NONE on the bottom and vise versa… we don’t want to look like a skanky stripper with eye liner alllll around circling the eye (again IF that’s the look you’re going for… balls to the wall and DO IT, we love us some stripper looks), but if you are going for any Vintage Classic look… it’s all about the thick top eyeliner. This gives of the illusion of bigger eyes… and who doesn’t want BIGGER eyes? Along with achieving a bigger, vintage eye, if you aren’t natural blessed with amazing eye lashes… go with the thick FAKES... nothings more classic 30’s-60’s than that!

-You'll need to use an eye shadow to compliment the rest of your makeup and clothing but use a light shimmer shade on the BROW BONE and in the inner crease of the eye (ya know the part of the eye you itch if you have really bad allergies… and the part where your tears mostly come from… if that helps… I’m not a real doctor but I play one on TV HA); so that your eyes will appear more alive. And then on top of that if you are doing a dark smoky look… smoke it up and go dark bold and CRAZY!

(Really work on those eyes and lips. These are the two key features in a photo shoot ).

Good luck... and I know you will all be too hot to handle that Universes will collide and explode with awesomeness by the time these shoots are done!
Posted by Laura at 8:42 AM 3 comments
Email This BlogThis! Share to X Share to Facebook
Labels: tips
Older Posts Home
Subscribe to: Posts (Atom)

Connect with Us

Grab the Button


Silliness.

  • Click here to see how we began.

Followers

Blog Design by

Blog Archive

  • ▼  2011 (6)
    • ▼  October (2)
      • Announcement follow-up.
      • Important announcement:
    • ►  April (1)
    • ►  January (3)
  • ►  2010 (17)
    • ►  December (1)
    • ►  November (1)
    • ►  October (3)
    • ►  September (1)
    • ►  August (3)
    • ►  July (8)
Powered by Blogger.
 

Babbling Brooke Designs All rights reserved © 2011